Instead of single new year resolution I decided to make four instead. I will create and launch 4 projects in 2025. There will be a separate post on why and how, but this one is about tech stuff.
To launch 4 projects successfully I need a good infrastructure that will not stand in the way, but enable easier deploys and fast shipping. I’ve used Heroku before, later moved on to Dokku and even used Kubernetes for Dental Space One. It’s my hobby, so I expect the projects to run on a single virtual machine making it dead-simple to operate. In this case one could take Dokku and be done with it, but running it for 3 years in production I would like to have something more simple and reliable, using the declarative approach instead of custom configuration for each application.
New Tool: Traefik
One of the most important infrastructure pieces for this ambition is a proxy server. This is the application that accepts requests to your server, it’s the entry point, and balancer of your workloads, and gateway to the rest of your infrastucture, and front door of your castle.
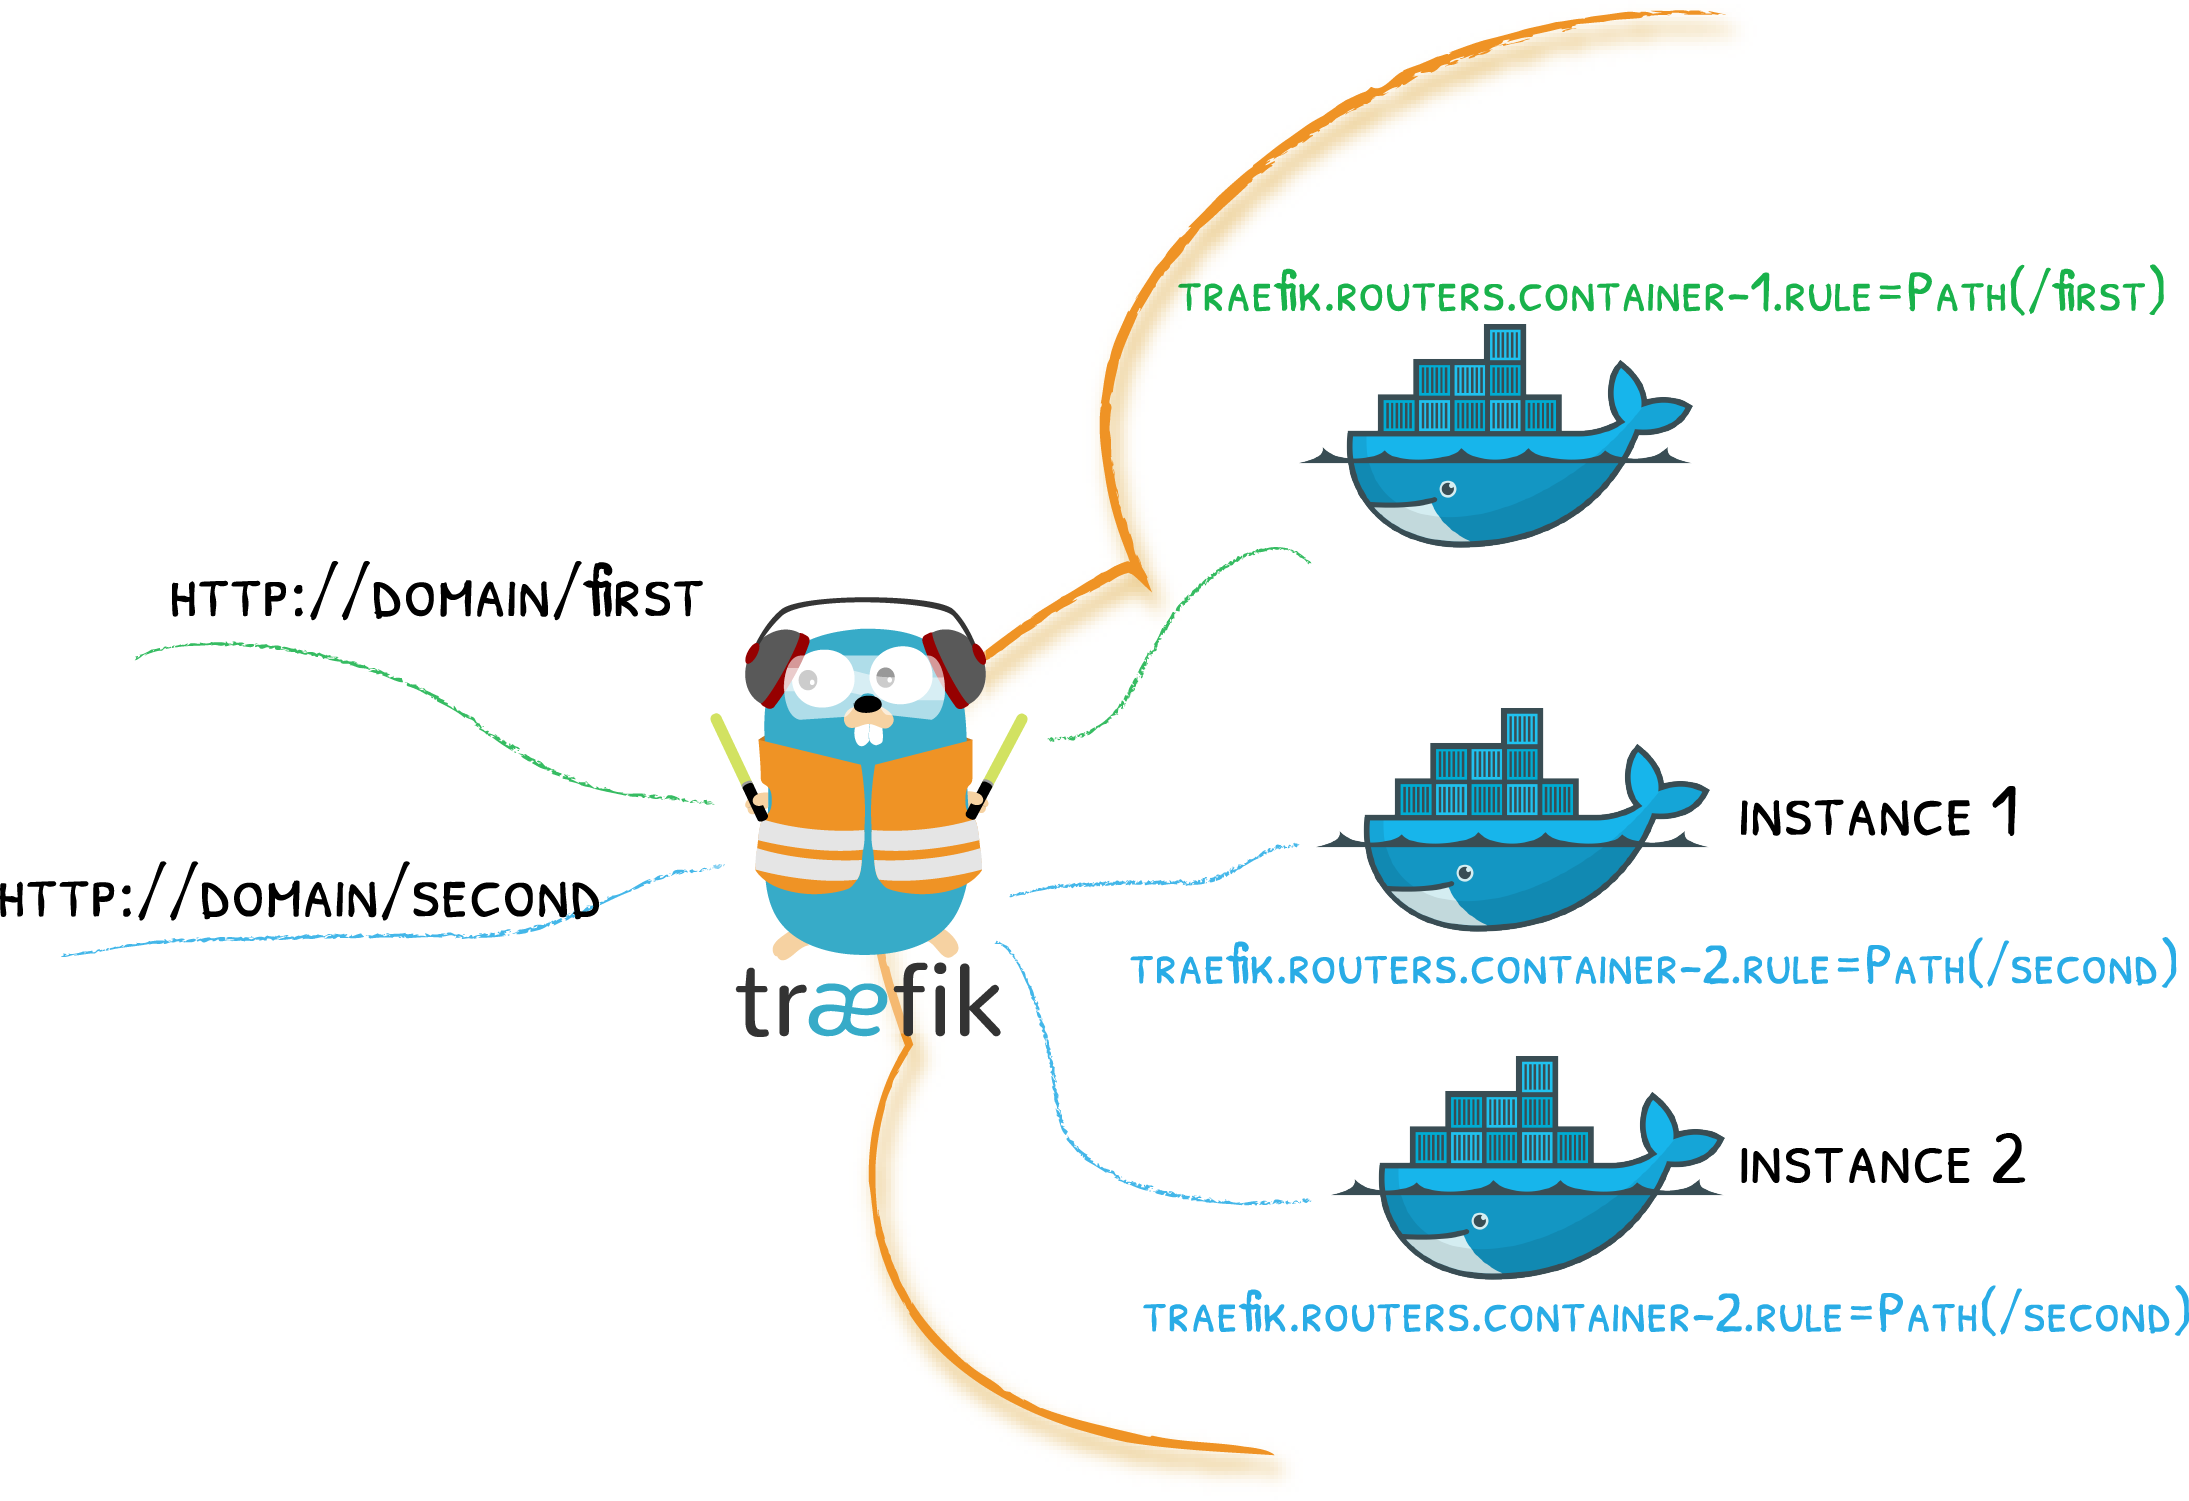
It was a long time since I’ve heard last about Traefik web server. They have wonderful love story with docker, many labels. Essentially the tool that we need to label our containers correctly and expose to the internet.
Let’s start launching it for traefik:
# on the destination host machine
mkdir -p  traefik/acme
# All services that reverse proxy will be communicating must be in single network
docker network create proxy-net
Now let’s get our Traefik traefik/docker-compose.yaml in order:
---
networks:
  proxy-net:
    external: true

services:
  reverse-proxy:
    # The official v3 Traefik docker image
    image: traefik:v3.3
    env_file:
      - .env
    networks:
      - proxy-net
    # Enables the web UI and tells Traefik to listen to docker
    command:
      - --log.level=INFO
      - --api.insecure=true
      # Docker provider configuration
      - --providers.docker
      - --providers.docker=true
      # do not expose everything by default
      - --providers.docker.exposedbydefault=false
      - --providers.docker.network=proxy-net
      # Entrypoints
      - --entrypoints.web.address=:80
      - --entrypoints.websecure.address=:443
      # I guess you can load balance tcp as well if you need it
      # Add HTTP to HTTPS redirect
      - --entrypoints.web.http.redirections.entrypoint.to=websecure
      - --entrypoints.web.http.redirections.entrypoint.scheme=https
      # Let's encrypt
      - --certificatesresolvers.letsencrypt.acme.email=${ADMIN_EMAIL}
      - --certificatesresolvers.letsencrypt.acme.storage=/acme/acme.json
      - --certificatesresolvers.letsencrypt.acme.tlschallenge=true
    ports:
      # The HTTP(s) ports
      - "80:80"
      - "443:443"
    volumes:
      # So that Traefik can listen to the Docker events
      - /var/run/docker.sock:/var/run/docker.sock:ro
      # to store certificates
      - /root/traefik/acme:/acme:rw
    labels:
      # Add dashboard specific configurations
      - traefik.enable=true
      - traefik.http.routers.dashboard.rule=Host(`${ADMIN_HOSTNAME}`)
      - traefik.http.routers.dashboard.service=api@internal
      - traefik.http.routers.dashboard.tls=true
      - traefik.http.routers.dashboard.tls.certresolver=letsencrypt
      - traefik.http.routers.dashboard.middlewares=auth
      - traefik.http.middlewares.auth.basicauth.users=${ADMIN_CREDENTIALS}
As we used the variables from traefik/.env file, let’s populate them:
# on the destination machine
cd ~/traefik

# Generate htpasswd (using openssl for bcrypt hash)
export ADMIN_CREDENTIALS=$(htpasswd -nB username password)
# Escape special characters for .env file
ADMIN_CREDENTIALS_ESCAPED=$(printf '%s\n' "$ADMIN_CREDENTIALS" | sed -e 's/[\/&]/\\&/g')

# Create .env file with the following content
cat > .env << EOL
[email protected]
ADMIN_HOSTNAME=traefik.yourdomain.com
ADMIN_CREDENTIALS=${ADMIN_CREDENTIALS_ESCAPED}
EOL
while don’t forget to change username password [email protected] and traefik.yourdomain.com.
Now let’s turn it on:
# on destination machine
cd ~/traefik
# start the reverse proxy
docker compose up -d
Everything that’s needed at this point is to create the A DNS record for traefik.yourdomain.com. Once everything works out, you will be able to access https://traefik.yourdomain.com/ with enabled HTTP Base authentication with admin credentials.
And Now Your App
Now let’s make some space for your app:
# on destination machine
mkdir ~/website
As you’ve developed your application, you probably already have the ~/website/docker-compose.yaml for it. If case you don’t let’s use this example:
---
networks:
  proxy-net:
    external: true
  default: ~

services:
  web:
    image: ${WEB_IMAGE}
    env_file:
      - .env
    networks:
      - proxy-net
      - default
    ports:
      - "${WEB_PORT}:${WEB_PORT}"
    depends_on:
      - db
    links:
      - db
    labels:
      - traefik.enable=true
      - traefik.docker.network=proxy-net
      - traefik.http.routers.${APP_NAME}.rule=Host(`${WEB_HOSTNAME}`)
      - traefik.http.routers.${APP_NAME}.tls=true
      - traefik.http.routers.${APP_NAME}.tls.certresolver=letsencrypt
      - traefik.http.services.${APP_NAME}.loadbalancer.server.port=${WEB_PORT}
      - traefik.http.services.${APP_NAME}.loadbalancer.healthcheck.path=/
      - traefik.http.services.${APP_NAME}.loadbalancer.healthcheck.interval=10s
      - traefik.http.services.${APP_NAME}.loadbalancer.healthcheck.timeout=1s
      - traefik.http.services.${APP_NAME}.loadbalancer.healthcheck.hostname=${WEB_HOSTNAME}
      - traefik.http.services.${APP_NAME}.loadbalancer.healthcheck.scheme=http
      - traefik.http.services.${APP_NAME}.loadbalancer.healthcheck.headers.Host=${WEB_HOSTNAME}
  db:
    image: postgres:16
    env_file:
      - .env
    networks:
      - default
    volumes:
      - pgdata:/var/lib/postgresql/data

volumes:
  pgdata:
In this example, your our application has a web service and the postgres:16 database. These will need configuration as well:
# on destination machine
cd ~/website
cat > .env << EOL
APP_NAME=ping
WEB_HOSTNAME=yourdomain.com
WEB_PORT=8000
WEB_IMAGE=crccheck/hello-world
EOL
Obviously WEB_IMAGE might be different for you as well as the other options. You will probably use the private registry, so don’t forget to authenticate with docker login before launching.
pro tip: feel free to put your other application configuration in this
~/website/.envfile as well as it will be available to your application at runtime.
Now let’s point the A DNS record of yourdomain.com to the same destination IP and:
# on destination machine
cd ~/website
docker compose up -d
At this point Traefik dashboard will recognize the new service available for it and will setup the rest of reverse proxy configuration.
Limitations
To ensure this setup works well for you and your applications, make sure that you will utilize the firewall on your machine to keep it secure. For this setup, you want to access your machine on port 22, 80, and 443. So add these rules accordingly so that your application port was not externally available.
You are also limited to the number of ports on the network interface. Each network interface has a total of 65,535 available TCP ports (1-65535), and the same number for UDP ports. While this is a large number, each running service that needs a port will consume one. Not that you will run out of the ports (but you might want to try by building so many apps), but you will not be able to launch two instances of your app that would listen to the same port. Essentially your attempt to
# on destination machine
docker compose scale web=2
will fail with misery of unavailable port. I guess there are smart ways of overcoming this limitation, but they will definitely make your docker-compose.yaml a bit more complex. Or your startup scripts. I will investigate how to overcome this limitation in the next iterations of this idea.
Variations
You might also consider that spinning up a separate Postgresql (for instance) server will cause compute and memory overhead at least, so you might put your shared resources on the separate network and have those networks available for your applications. In that case, single Postgresql process will be servicing multiple applications from multiple databases.
Bonus
As I’ve released RelayDon I realized that I’ve also invented Github Action for Continuous Deployment. Although make sure that you modify it to your needs.
Conclusion
First off, I hope this will help you deploy your new project faster. Either publicly available or on your home server or raspberry pi or anything that runs containers.
I also think that the limitations I can overcome, but I don’t want to keep this article in the draft mode for too long while I find time to overcome them. So here’s the first article in three difficult years I guess.
If you have feedback, shoot it over the email and I’ll update the article accordingly.